Philippines DIYTools & EquipmentBeginner Friendly2026 Guide
Top Tools You Need to Setup Your Solar
Philippines · 2026 · By Solar Panda
This is a different list from things you need to start your DIY solar setup. That article covers the electrical components — panels, MPPT controller, battery, inverter. This one covers the physical tools you actually hold in your hand to wire, mount, and test those components. You can have every component on your parts list and still get stuck without the right tool for a clean MC4 crimp or a properly torqued panel clamp.
TL;DR
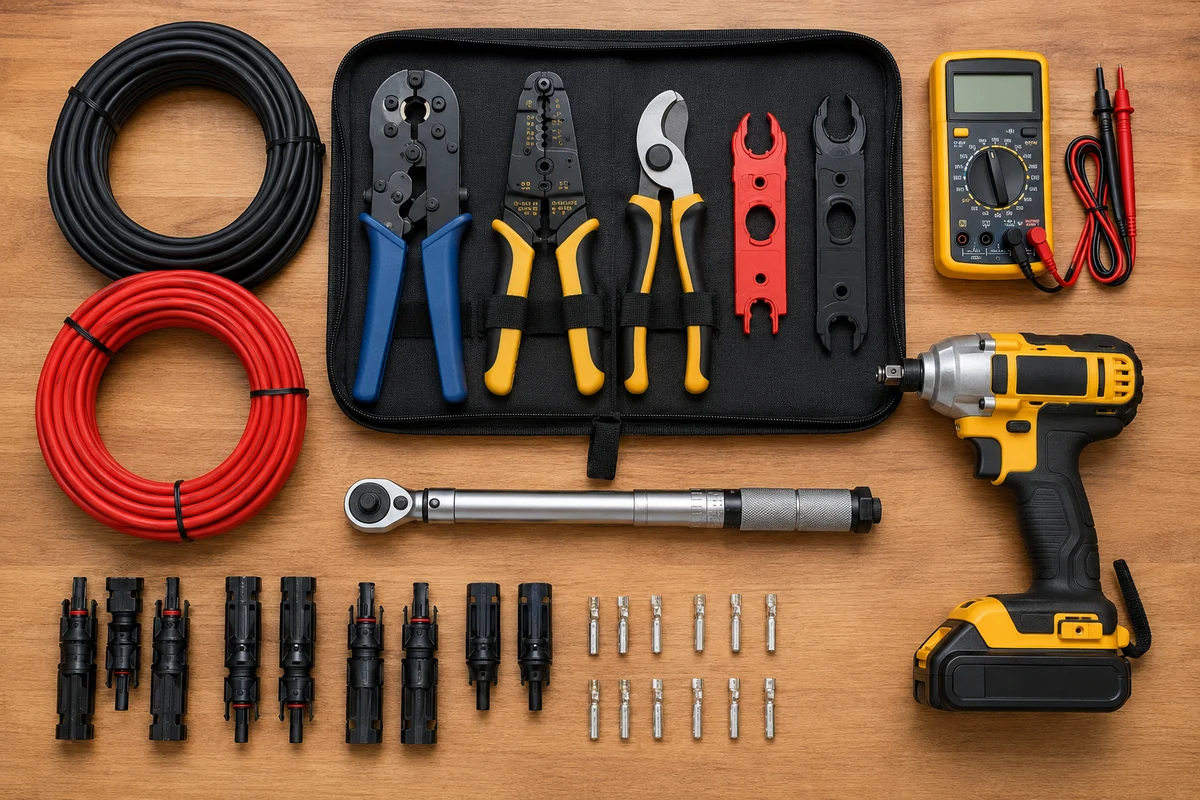
Eight tools cover a standard DIY solar install: an MC4 crimping tool, PV wire stripper, heavy-duty cable cutter, and MC4 assembly/disassembly spanners for wiring; a digital multimeter for testing; and an impact drill/driver, torque wrench, and measuring tape + level for mounting. Most of the wiring tools come bundled together as a solar crimping kit, which is usually the cheaper way to buy them.
Wiring & connectors
Every panel-to-panel and panel-to-controller connection in a DIY solar setup runs through an MC4 connector, and a bad crimp here is one of the most common causes of hot spots, arcing, or an intermittent connection that's maddening to diagnose later. These four tools are what make that connection reliable.
| Tool | What it's for | Why it matters |
|---|---|---|
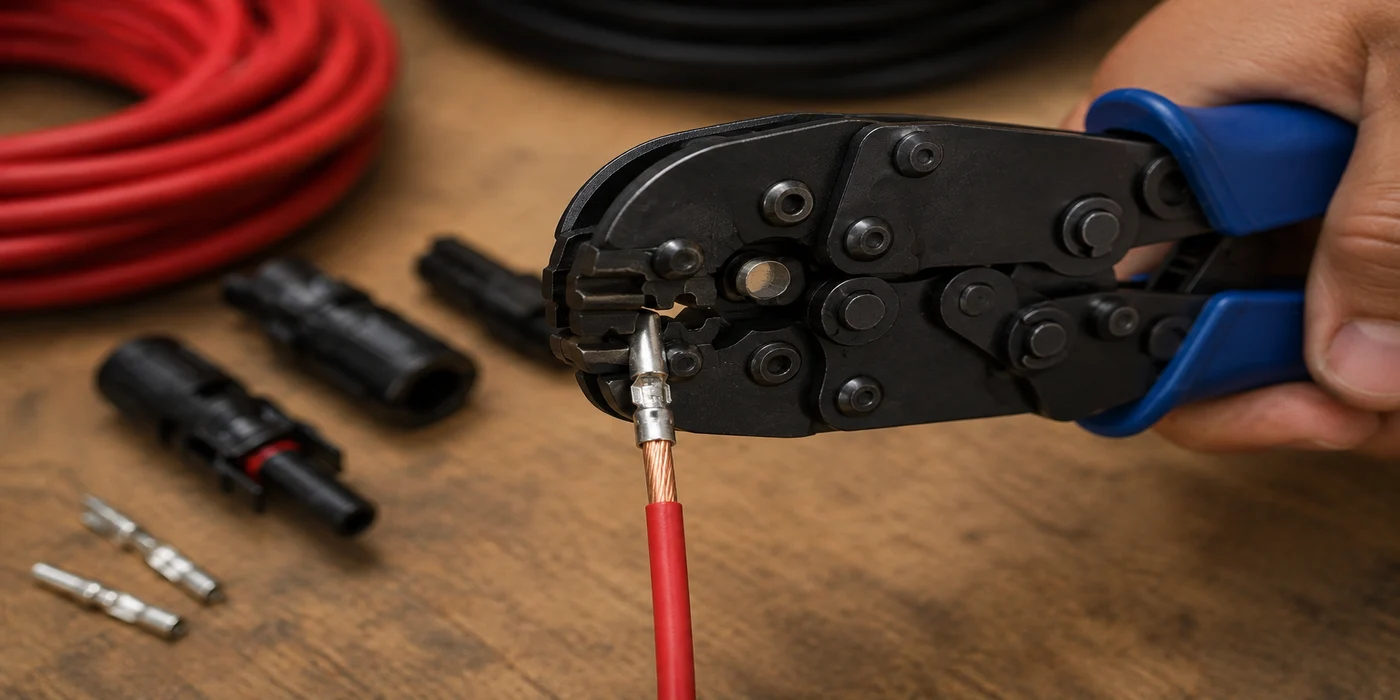
| MC4 crimping tool | Crimps the male/female MC4 pins onto your PV wire | Applies the exact pressure needed for a gas-tight mechanical crimp — pliers or a generic crimper leave a loose connection that heats up under load |
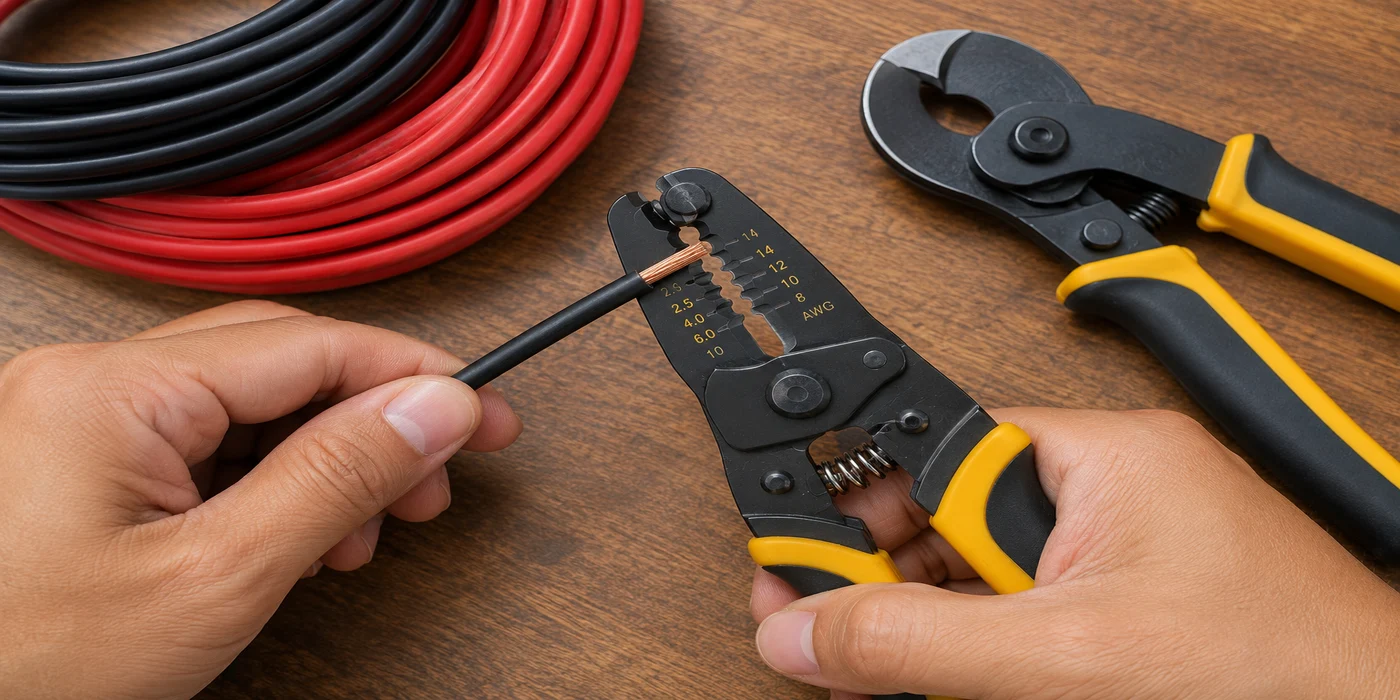
| PV wire stripper | Strips insulation to the exact length an MC4 pin needs | Strip too little and the pin doesn't seat fully; strip too much and bare copper sits exposed under the connector housing |
| Heavy-duty cable cutter | Cuts PV wire cleanly to length | A clean, flat cut (not a crushed or angled one) is what lets the wire strip and crimp properly in the first place |
| MC4 assembly/disassembly spanners | Tightens the connector's gland nut; unlocks connectors for rework | A hand-tightened gland nut isn't watertight — rooftop connectors need the sealed fit these spanners are designed to apply |
✓
These four are almost always sold together as a single "solar crimping tool kit" — buying the bundle is typically cheaper than sourcing each piece separately, and it guarantees the crimper and connector sizes actually match.
A clean strip and cut come first — a crimp only holds as well as the wire prep underneath it:
Testing
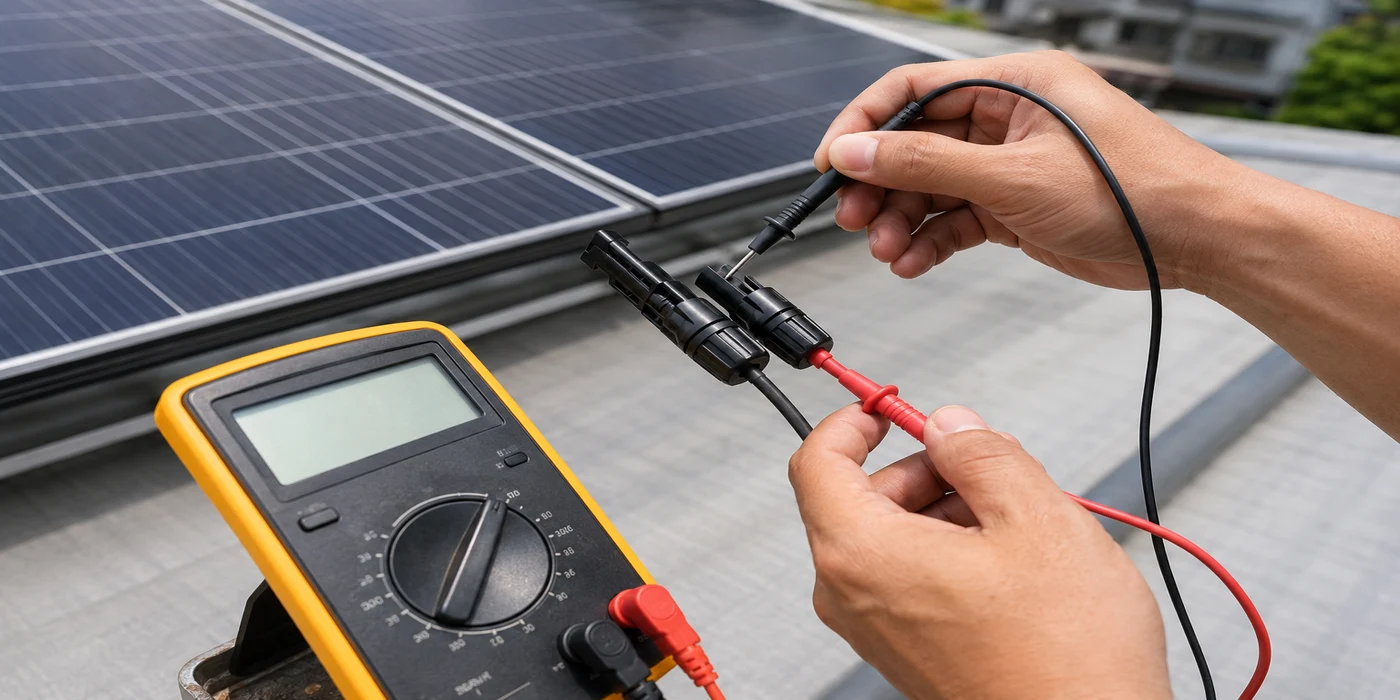
Digital multimeter. Set to DC voltage and continuity mode, this is what confirms a panel string is producing the voltage you expect before you connect it to your charge controller, and what confirms a wire run has continuity end to end with no break in the insulation-stripped section. Any basic digital multimeter with a DC voltage range that covers your system voltage (12V/24V/48V setups all fall well within an entry-level meter's range) is enough for this — you don't need a lab-grade unit for a home install.
Mounting
| Tool | What it's for |
|---|---|
| Impact drill/driver + bits | Drilling mounting holes and driving screws for rails, brackets, and clamps into your roof structure |
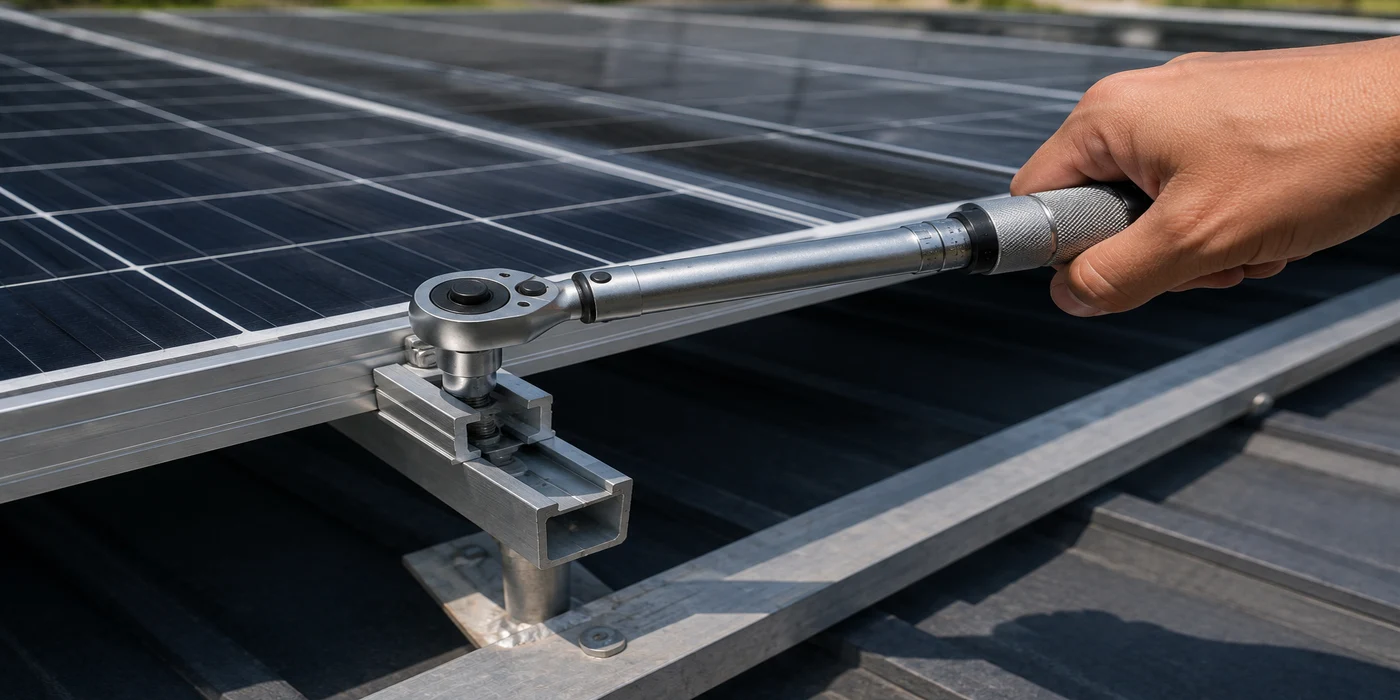
| Torque wrench | Tightening panel clamps and racking hardware to the manufacturer's specified torque — not by feel |
| Measuring tape + level | Laying out panel rows evenly and keeping mounting rails straight before you drill a single hole |
Why the torque wrench isn't optional: over-tighten a panel clamp and you risk microcracks in the cells right at the clamp point — damage you won't see until output quietly drops months later. Under-tighten it and wind uplift works the clamp loose over time. A basic click-type torque wrench set to your panel manufacturer's spec removes the guesswork either way.
What this typically costs
Prices vary by brand and where you buy, but here's the general range these eight tools run in the Philippine market — treat this as a planning budget, not a quote:
| Tool | Typical price range |
|---|---|
| MC4 crimping kit (crimper + stripper + cutter + spanners, bundled) | ₱900 – ₱2,500 |
| Digital multimeter (basic, CAT III rated) | ₱400 – ₱1,500 |
| Impact drill/driver (entry-level) | ₱1,500 – ₱5,000 |
| Torque wrench (click-type, basic) | ₱800 – ₱2,500 |
| Measuring tape + level (combined) | ₱150 – ₱500 |
Bought as a set for a first-time DIY install, expect to spend roughly ₱3,750 – ₱12,000 on tools — a one-time cost, since every tool on this list gets reused for future maintenance, panel additions, or a friend's setup down the line. Solar Panda doesn't currently carry these as affiliate products, so shop your local hardware supplier or marketplace listing and compare against the ranges above.
Mistakes we see in the DIY groups
Using pliers instead of a real MC4 crimper. It looks crimped from the outside, but without the correct die shape and pressure, the connection underneath is loose — this is one of the most common causes of a hot connector reported in DIY groups months after install.
Skipping the multimeter check before connecting to the controller. Wiring a reversed-polarity string straight into an MPPT charge controller without testing first can damage the controller. Thirty seconds with a multimeter avoids the whole problem.
Tightening panel clamps "until it feels tight." Feel isn't a spec. Check your panel manufacturer's torque rating and use the wrench set to that number, not to your judgment.
Before you start wiring
- "Do I have a real MC4 crimper, or am I about to improvise with pliers?"
- "Have I tested this string's voltage and polarity before it touches the controller?"
- "Am I tightening panel clamps to spec, or just until it feels tight?"
Bottom line
Eight tools — an MC4 crimping kit, a digital multimeter, and three mounting tools — cover the physical work of a standard DIY solar install. They're a one-time purchase, most of the wiring tools come bundled cheaper as a kit, and skipping any of them tends to show up later as a loose connector, a damaged controller, or a cracked panel cell rather than as a problem on day one.
Once your tools are sorted, pair this with the components you need to start your setup and run your numbers with the kW calculator. Any term you're unsure of is also in the glossary.
Ready to size your system?
Get panel count, hybrid inverter size, battery bank, and total cost for your setup.
Open the kW calculatorFrequently asked questions
- What tools do I need to install solar panels myself?
- Eight core tools: an MC4 crimping tool, PV wire stripper, heavy-duty cable cutter, and MC4 assembly/disassembly spanners for wiring connections; a digital multimeter for testing; and an impact drill/driver, torque wrench, and measuring tape + level for mounting panels to your roof.
- Do I need a special crimping tool for solar panels, or can I use regular pliers?
- You need a real MC4 crimping tool. Pliers or a generic crimper can look crimped from the outside but leave a loose connection underneath without the correct die shape and pressure, which is one of the most common causes of hot or arcing connectors reported in DIY solar groups.
- Why do I need a torque wrench for solar panel installation?
- Panel mounting clamps have a manufacturer-specified torque. Over-tightening with a regular wrench risks microcracks in the solar cells at the clamp point, which quietly reduce output over time. Under-tightening lets wind uplift work the clamp loose. A click-type torque wrench set to spec removes the guesswork.
- How much do solar installation tools cost in the Philippines?
- Roughly ₱3,750-₱12,000 total for all 8 tools, depending on brand. An MC4 crimping kit (bundled crimper, stripper, cutter, and spanners) typically runs ₱900-₱2,500, a basic digital multimeter ₱400-₱1,500, an entry-level impact drill ₱1,500-₱5,000, a basic torque wrench ₱800-₱2,500, and a tape measure + level ₱150-₱500. It's a one-time cost since the tools get reused for future maintenance or additions.